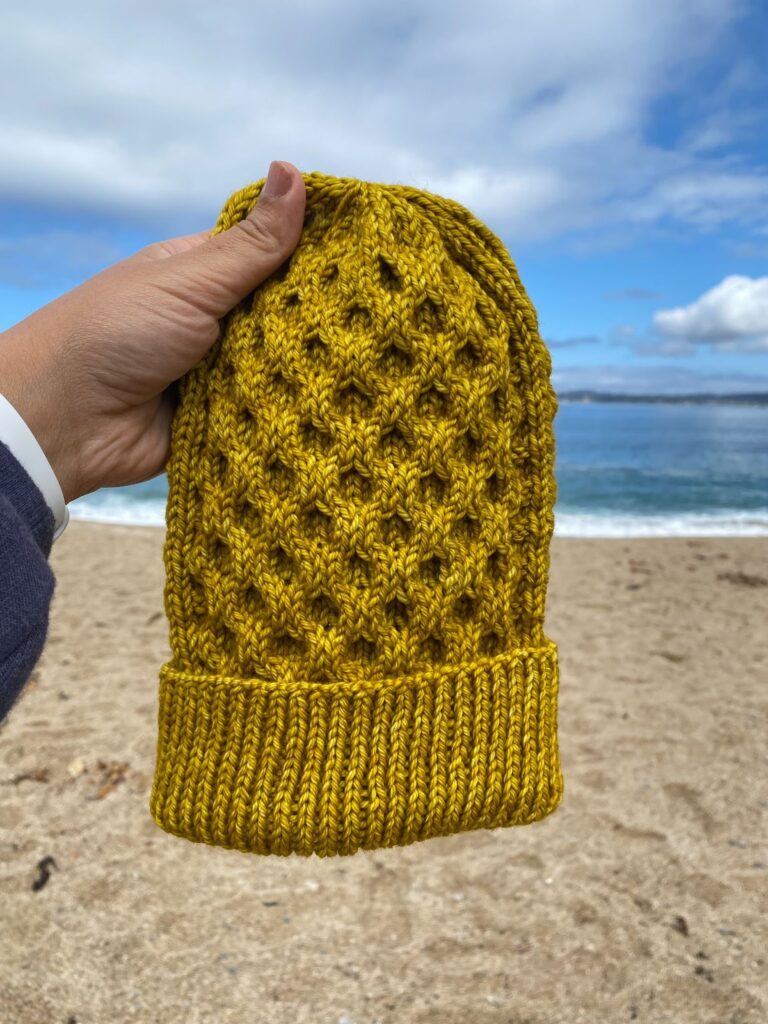
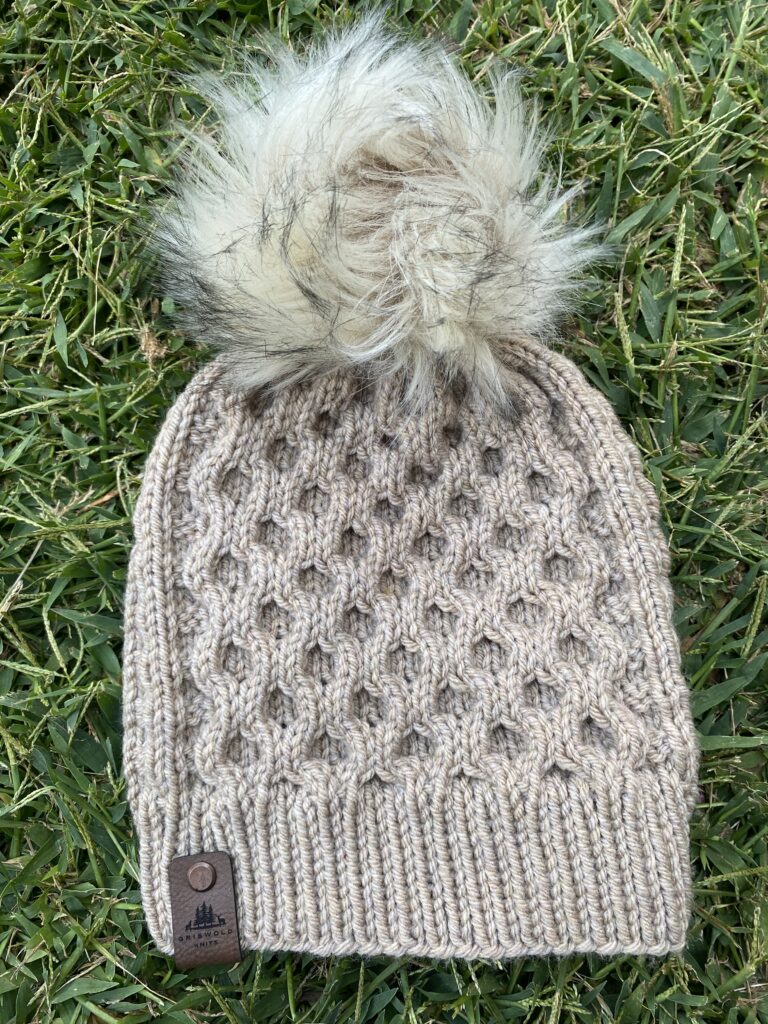
I had so much fun designing the Waffles With Honey Hat! It features a panel of beautiful honeycomb cabling surrounded on either side by a modified waffle stitch motif. Hence the name “Waffles With Honey.” My goal was to create a very textural but balanced beanie. I hope you knit one of these bad boys, if you do let me know what you think! They are so cozy and give me all the fall feels. Be sure to tag me on Instagram and use the hashtags #griswoldknits and #waffleswithhoneyhat because I would love to see your work!

Yarn: This pattern is designed for medium worsted weight yarn. I used Malabrigo Rios in the color Frank Ocre. I also used Yarn Bee Yarn ID in Fawn (pictured below). However, you can use any comparable yarn that meets the gauge requirements.
Yardage for Single Brim: 60g or 126yds
Yardage for Folded Brim: 80g or 168 yds
This post contains affiliate links, which means I may receive a small commission if you purchase through my links, at no extra cost to you. Please read full disclosure for more information.
Supplies:
- US 7 (4.5 mm) 16” Circular Knitting Needles
- US 9 (5.5 mm) 16” Circular Knitting Needles
- Medium Worsted Weight Yarn
- Place Markers (PM)
- Cabling Needle (CN)
- Tapestry Needle for weaving in ends
- Measuring Tape
- US 9 (5.5 mm) Double Pointed Needles for decreasing (optional)
Abbreviations:
K– Knit
P– Purl
K2TOG: Knit two stitches together
P2TOG: Purl two stitches together
CN: Cabling Needle
C4B (Cable 4 Back): Slip 2 stitches onto your Cabling Needle and hold towards the back of your work. Knit the next 2 stitches from your left hand needle and then knit the 2 stitches off of your CN.
C4F (Cable 4 Front): Slip 2 stitches onto your Cabling Needle and hold towards the front of your work. Knit the next 2 stitches from your left hand needle and then knit the 2 stitches off of your CN.
PM: Place Marker
CO: Cast On
Sts: Stitches
* * Repeat instructions within asterisks
Skill Level: Advanced Beginner
Hat Dimensions:
Single Brim: 8-8 and ¼ inches long and 7 inches wide
Folded Brim: 10 and ½ inches long and 7 inches wide
Gauge: (2×2 inch stockinette in the round) 10 sts x 13 rows using 5.5 mm circular needles
Important Notes
-Be sure to check your gauge! I found when knitting this beanie with acrylic yarns such as Hobby Lobby’s I Love This Yarn and Impeccable Yarn by Loops and Thread, I needed to size down to 5.0 mm circular knitting needles to get the correct fit. Malabrigo Rios tends to be thinner than most medium worsted acrylic yarns.
– Keep knitting tension snug when working the cables so they aren’t too loose. Keeping your tension tighter will mitigate gapping between cables.
-I highly recommend using stitch markers as indicated in the pattern. Using SM’s will help you keep track of your knitting. Make sure your beginning round stitch marker is different from the PM’s within the body of the pattern. This will prevent any confusion as to where the beginning of the round is.
–End on rounds 3 or 7 before beginning decrease
-The decrease section will add approximately ½ inch to your hat. Keep this in mind if adjusting the length of your hat
Instructions: Using 4.5 mm circular knitting needles CO 94 sts and join in the round. Begin knitting the brim of the hat. You can choose either a single brim or a folded brim.
Single Brim: *K1, P1* for 12 rounds
Folded Brim: *K1, P1* until the brim measures 4.5 inches
Once the brim is complete, switch to 5.5 mm circular knitting needles (or the appropriate needle size to match the gauge requirements) and proceed to the body of the hat.
Body:
- K28, PM, K40, PM, K26
- K28, PM, K40, PM, K26
- *K2,P2* (x7), PM, *C4B,C4F* (x5), PM, *P2, K2* (x6), P2
- *K2,P2* (x7), PM, K40, PM, *P2,K2* (x6), P2
- K28, PM, K40, PM, K26
- K28, PM, K40, PM, K26
- *K2, P2* (x7), PM, *C4F, C4B* (x5), PM, *P2,K2* (x6), P2
- *K2, P2* (x7), PM, K40, PM, *P2, K2* (x6), P2
For a single brim hat, repeat rounds 1-8 until your hat measures 7.5 inches from the CO edge. End on rounds 3 or 7 and proceed to decrease.
For a folded brim hat, repeat rounds 1-8 until your hat measures 10 inches from the CO edge. End on rounds 3 or 7 and proceed to decrease.
Decrease:
- *K2, P2TOG* (x7), PM, *K2, K2TOG* (x10), PM, *P2TOG, K2* (x6), P2TOG (70sts)
- *K* slip PM’s as you go
- *K2TOG, K1* (x7), PM, *K1, K2TOG* (x10), PM, *K1, K2TOG* (x6), K1 (47sts)
- *K* Remove Place Markers as you go EXCEPT the beginning of round marker
- *K2TOG* until the last stitch then Knit the last st. (24sts)
- *K*
- *K2TOG* (12sts)
Cut the working yarn and leave a tail long enough to cinch your beanie. If you knit a single brim the completed hat should measure approximately 8 inches from the CO edge to the top of the hat. If you knit a folded brim your hat should measure approximately 10 and ½ inches from the CO edge to the top of the hat when the brim is unfolded. Weave in the ends and enjoy your hat!
Thank you so much for stopping in and hopefully knitting my hat! You are more than welcome to sell your Waffles With Honey hats in small quantities, but please give credit for my pattern design griswoldknits.com. I share my designs for free in good faith that you will respect my intellectual property. Please do not copy, recreate, sell or distribute my pattern ©2023 GriswoldKnits, All rights reserved. I would love to see your work! Tag me on instagram @griswold.knits and use the hashtags #Griswoldknits and #waffleswithhoneyhat


