Looking for a sweet and simple pumpkin tutorial, look no further! These mini pumpkins are easy to knit, super cute and make the perfect stash busting project. You can dress them up or down, go traditional, colorful or make them spooky! Follow along as I knit these cuties on my YouTube channel Griswold Knits or using the written pattern below.
This post contains affiliate links, which means I may receive a small commission if you purchase through my links, at no extra cost to you. Please read full disclosure for more information.
MINI PUMPKINS
Materials:
- https://amzn.to/3YLVuIW4.5mm circular knitting needles or 4.5mm Double Pointed Needles
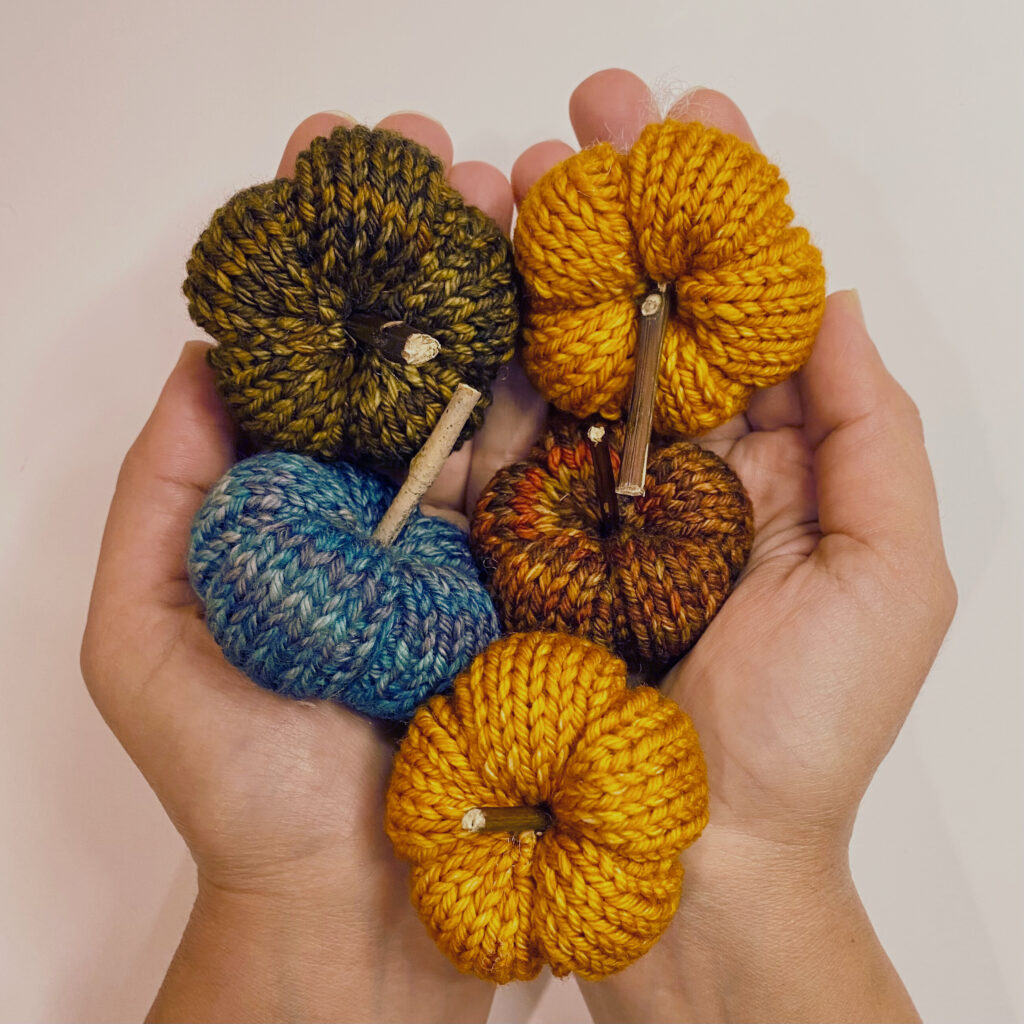
- Medium Worsted Weight yarn. I used Malabrigo Rios in Sunset, Kris, Glitter and Vulcan. Feel free to use any yarn you’d like!
- Poly-Fil/Stuffing
- Tapestry Needle
- Twigs/sticks/cinnamon sticks for stems
- Hot glue gun for gluing stems
Abbreviations:
K– Knit
P-Purl
CO– Cast On
K2TOG– Knit two together
** repeat instructions within the asterisks
INSTRUCTIONS: (SEE VIDEO AS NEEDED)
Using your 4.5mm Needles cast on 30 stitches and join in the round.
Body of Pumpkin: *K5, P1* until it measures 2 inches in length from the cast on edge.
Once pumpkin is 2 inches or desired length knit one decrease round: *K2, K2TOG*
Cut a long tail 15-20 inches
Next, Attach the tail to your tapestry needle and weave the tail through the remaining stitches. Pull tight and cinch the end of your pumpkin. This will be the bottom of your mini pumpkin.
Turn your pumpkin over so that the open side is facing up. Begin stuffing your pumpkin with poly-fil. Do your best to not overfill or under stuff your pumpkins. You want them to be plump but not so full that you can’t shape them. That being said, this is a very forgiving pattern and there is a lot of room to play with the look of your pumpkin.
Once your pumpkin is stuffed to your liking, you will need to cinch the open side of your pumpkin. As you are cinching you can continue to add stuffing as you go to create your desired shape. Leave an opening big enough for you to insert a stem.
Finally, use your remaining tail to create pumpkin segments. Do so by running the tail alongside the grooves created by the purl stitches. Shape your pumpkin segments, choose a stem and glue it in the center of your beautiful pumpkin!
Repeat as many times as your heart desires and create your own little pumpkin patch! These little guys knit up quickly and are very versatile. They make great decor, accent pieces and fun little gifts. To all my maker friends out there, these would be a fun addition to your fall markers. Grab your scrap yarn and get going! I would love to see what you create! Tag me on Instagram @griswold.knits use the hashtags #minipumpkins #griswoldknits


