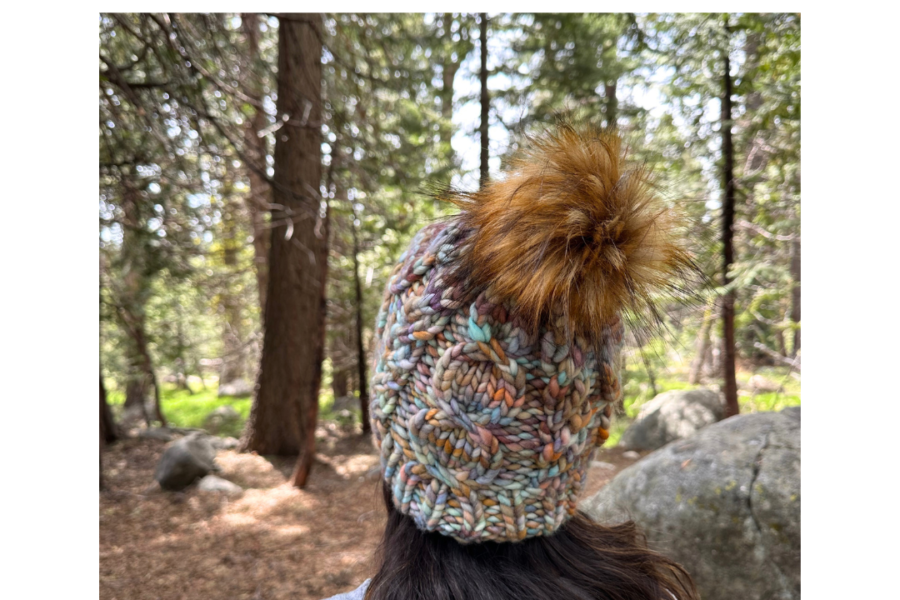
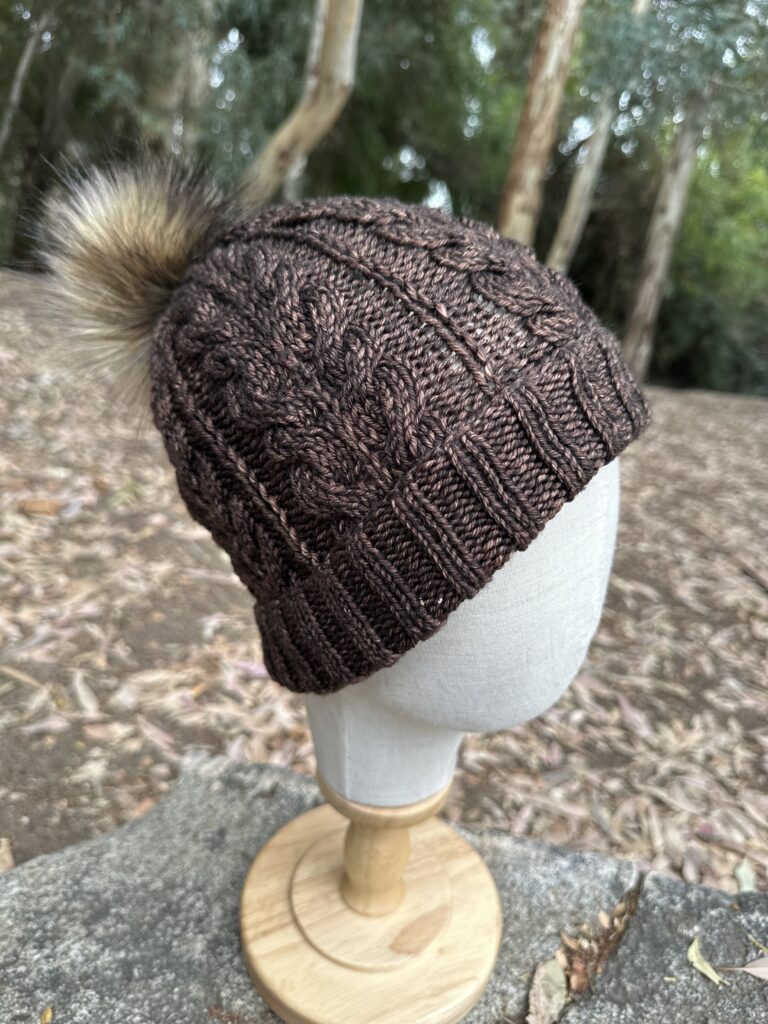
Here you will find instructions for knitting my Wild Oak Beanie in both Light Bulky and Medium Worsted weight yarn (See below).
Today I am going to share with you a design that is very near and dear to my heart.
The Wild Oak Beanie was my first official design, but more importantly it was inspired by my late grandfather Arthur Collins, and the hauntingly beautiful Oak trees that surrounded his property. Much like the Wild Oak, my grandfather was strong, stoic, and possessed a deep rooted wisdom that he lovingly shared with those around him.
I hope you enjoy this pattern just as much as I do. If you would like to purchase an add free PDF digital download you can do so over on my Etsy shop griswoldknits.etsy.com.
Lastly, if you are a beginner knitter or feel like you need a little extra guidance in making this hat don’t worry I’ve got you covered! Go check out my YouTube Channel Griswold Knits (Linked below) where you can find a Step-By-Step Tutorial on how to knit this lovely beanie. In Parts 2 and 3 I will show you how to knit the body and decrease your hat.
INSTRUCTIONS FOR LIGHT BULKY NO. 5 YARN
This post contains affiliate links, which means I may receive a small commission if you purchase through my links, at no extra cost to you. Please read full disclosure for more information.
Part 1
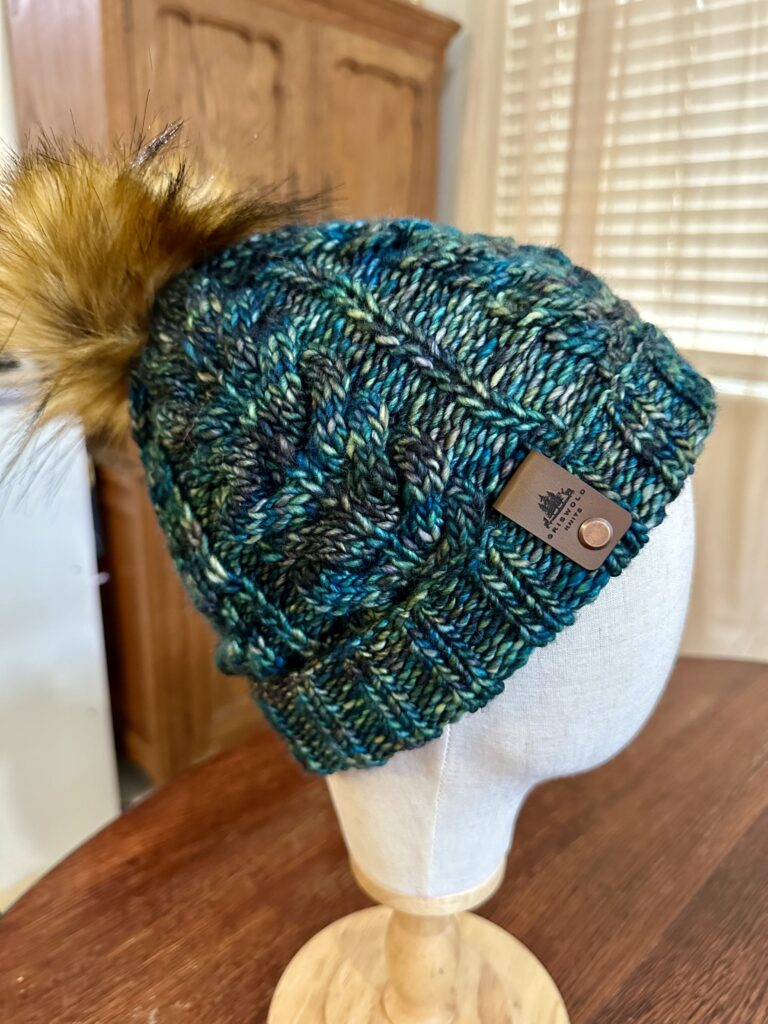
YARN: This hat is made using a Light Bulky Yarn. I used Malabrigo Mecha in Piedras but you can use any comparable yarn that meets the gauge requirements. Be sure to check your gauge, you may need to go up or down a needle size to get the right fit 🙂
Gauge: (2×2 inch stockinette in the round) 9 sts x 12 rows using US size 10 6mm circular needles
SUPPLIES:
- Us Size 10 6.0 mm 16 inch circular knitting needles
- Light bulky yarn approximately 100g or 130 yards
- Tapestry needle for weaving in ends
- Measuring tape
- Stitch markers (optional)
- US size 10 6.0 mm Double pointed needles (DPN)
- Cable Needle
ABBREVIATIONS:
K– Knit
P– Purl
Sts– Stitches
C6B (Cable 6 Back)- Slip 3 stitches onto your cable needle and hold towards the back of your work. Knit 3 stitches from the left hand needle, then knit 3 stitches from the cable needle
C6F (Cable 6 Front)- Slip 3 stitches onto your cable needle and hold towards the front of your work. Knit 3 stitches from the left hand needle, then knit 3 stitches from the cable needle
Sl1p wyib (Slip 1 purlwise with yarn in back)- Hold working yarn towards the back of your work. Insert the right needle into the stitch on the left hand needle as if to purl. Instead of purling, slip the stitch from the left hand needle to the right hand needle.
K2TOG– Knit 2 stitches together
K3TOG– Knit 3 stitches together
P2TOG– Purl 2 stitches together
KFB (knit front and back)- begin to knit the stitch as you would normally. Insert the tip of your right hand needle into the front of the stitch on your left hand needle. Wrap your working yarn over the tip of the right needle and pull it through the front of the loop. Instead of sliding the stitch off of the left hand needle, bring the tip of your right hand needle to the back of the stitch on your left needle and knit through the back as well. By knitting through the front and back of the same stitch you create two stitches in one.
** Repeat instructions within asterisks
Hat Dimensions: This pattern is for an adult sized womens hat.
Head circumference: 20-23 inches
Height: 9 inches for a single brim/ 11 inches for a folded brim
Width: 7- 7.5 inches
How to adjust your hat:
Please be sure to check your gauge. I tend to be a bit of a tighter knitter so you may need to go up or down a needle size depending on your yarn and knitting tension. If you need to adjust the size of your brim make sure to increase/decrease by multiples of 4. If you need to adjust the body of your hat you can increase/decrease by multiples of 18. In this pattern, I initially cast on 72 stitches for the brim (divisible by 4) and increase to 90 stitches for the body of the hat (divisible by 18).
Instructions for beginning your hat
Using 6.0 mm circular knitting needles cast on 72+1 (73) stitches to join in the round. The extra stitch is used when joining in the round so you will have 72 stitches when join is complete. This is just my personal preference. Feel free to use any method you like. Just make sure that you have 72 stitches total when you begin knitting your hat. Continue using 6.0 mm needles to knit either a single brim or a folded brim.
Option #1 Single Brim
Rounds 1-12: *K2,P2*
Round 13: Depending on your gauge, you may need to adjust your needle size. Make sure you switch to the appropriate size needles before knitting the increase round. If not, continue using 6.0mm circular knitting needles then *K3, KFB*. Once the increase round is complete you should have 90 stitches. Proceed to the body of the hat.
Option # 2 Folded Brim
*K2, P2* until your hat measures 4 inches from the cast on edge. Depending on your gauge, you may need to adjust your needle size. Make sure you switch to the appropriate size needles before knitting the increase round. If no change is necessary, continue using 6.0mm circular needles. Once you reach your desired length then *K3, KFB* for one round. You should now have 90 stitches. Proceed to the body of the hat.
*Note: I found that while going from a cable to a purl stitch, I was at times creating some larger than desired gaps. I am an English style knitter and I wrap my working yarn clockwise when knitting/purling. I suggest wrapping the yarn counterclockwise when purling after a cable to reduce gapping. This is only a suggestion and may not be applicable to everyone. If you are someone who naturally/habitually wraps your yarn in a counterclockwise motion then you likely wouldn’t encounter any issue. This is merely a suggestion to help mitigate gaps if present.
Body :
- * C6B, sl1p wyib, C6F, P2, sl1p wyib, P2 *
- * K13, P2, K1, P2 *
- * K6, sl1p wyib, K6, P2, sl1p wyib, P2 *
- * K13, P2, K1, P2 *
- * K6, sl1p wyib, K6, P2, sl1p wyib, P2 *
- * C6B, K1, C6F, P2, K1, P2 *
- * K6, sl1p wyib, K6, P2, sl1p wyib, P2 *
- * K13, P2, K1, P2 *
- * K6, sl1p wyib, K6, P2, sl1p wyib, P2 *
- * K13, P2, K1, P2 *
- * K6, sl1p wyib, K6, P2, sl1p wyib, P2 *
- * K13, P2, K1, P2 *
For single brim hats, repeat rounds 1-12 until your hat measures 8 and ½ inches from the cast on edge. Then begin to decrease. You can end the body of the hat on any row. The row you end on will determine which set of decreasing instructions you follow. When the stitches get too tight, switch to US size 10 6.0 mm DPN.
For a hat with a folded brim, repeat rounds 1-12 of the body until your hat measures 10 and ½ inches from the cast on edge. Then begin to decrease. You can end the body of the hat on any row. The row you end on will determine which set of decreasing instructions you follow. When the stitches get too tight, switch to your US size 10 6.0 mm DPNs.
Decreasing will add roughly ½ inch to your hat. Once finished, your hat should measure 9 inches total for a single brim and 11 inches total for a folded brim when you measure from the cast on edge to the top of your hat.
Decrease:
If you end on round 1,3, 5, 7, 9 0r 11
- * K13, P2, K1, P2 *
- * K2, K2TOG, K2, sl1p wyib, K2, K2TOG, K2, P2TOG, sl1p wyib, P2TOG *
- * K2, k2TOG, K4, K2TOG, K1, P1, K1, P1 *
- * K2TOG, K2TOG, sl1p wyib, K2TOG, K2TOG, P1, sl1p wyib, P1 *
- * K2TOG, K1, K2TOG, P1, K1,P1 *
- * K3TOG, P1, sl1p wyib, P1 *
If you end on round 2, 4, 6, 8 or 10
- * K6, sl1p wyib, K6, P2, sl1p wyib, P2 *
- * K2, K2TOG, K5, K2TOG, K2, P2TOG, K1, P2TOG *
- * K2, K2TOG, K1, sl1p wyib, K2, K2TOG, K1, P1, sl1p wyib, P1 *
- * K2TOG, K2TOG, K1, K2TOG, K2TOG, P1, K1, P1 *
- * K2TOG, sl1p wyib, K2TOG, P1, sl1p wyib, P1 *
- * K3TOG, P1, K1, P1 *
If you end on round 12
- * C6B, sl1p wyib, C6F, P2, sl1p wyib, P2 *
- * K2, K2TOG, K5, K2TOG, K2, P2TOG, K1, P2TOG *
- * K2, K2TOG, K1, sl1p wyib, K2, K2TOG, K1, P1, sl1p wyib, P1 *
- * K2TOG, K2TOG, K1, K2TOG, K2TOG, P1, K1, P1 *
- * K2TOG, sl1p wyib, K2TOG, P1, sl1p wyib, P1 *
- * K3TOG, P1, K1,P1 *
Once you have finished decreasing all that is left to do is cinch your beanie, weave in those ends and enjoy!
INSTRUCTIONS FOR NO. 4 MEDIUM WORSTED WEIGHT YARN
The instructions for the Medium worsted weight yarn version are pretty much the same as the light bulky weight yarn. However, for this project you will need a number 4 medium worsted weight yarn, different sized needles, and the number of cast on stitches and dimensions will differ. Check out the full written pattern below for all the details <3
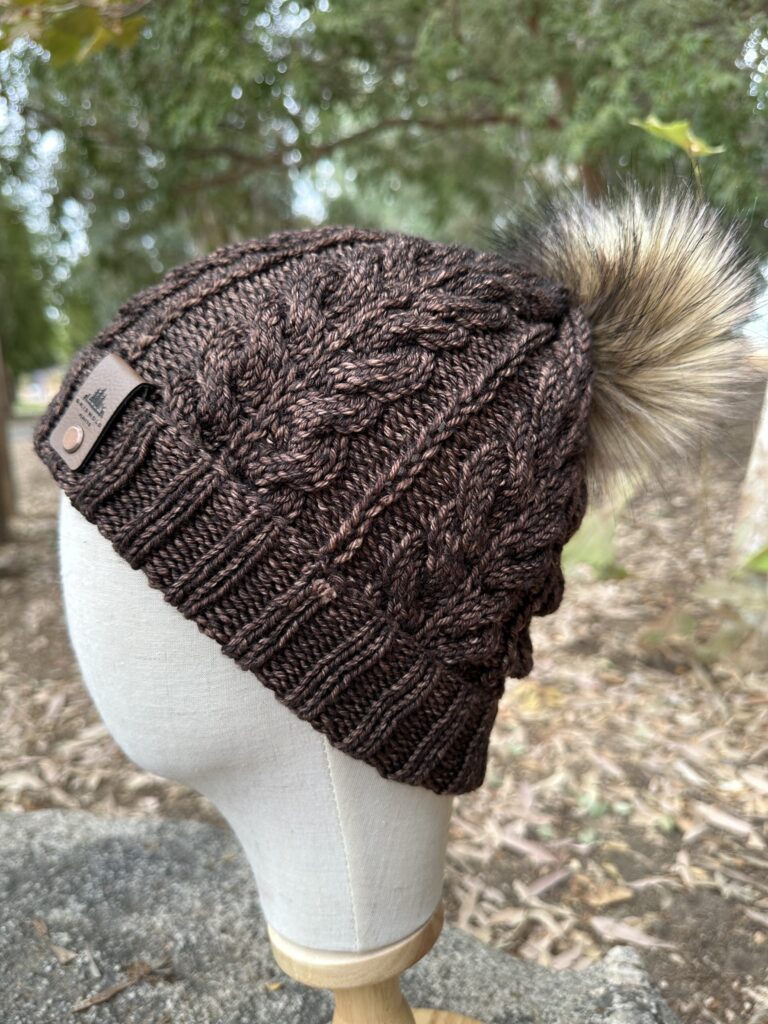
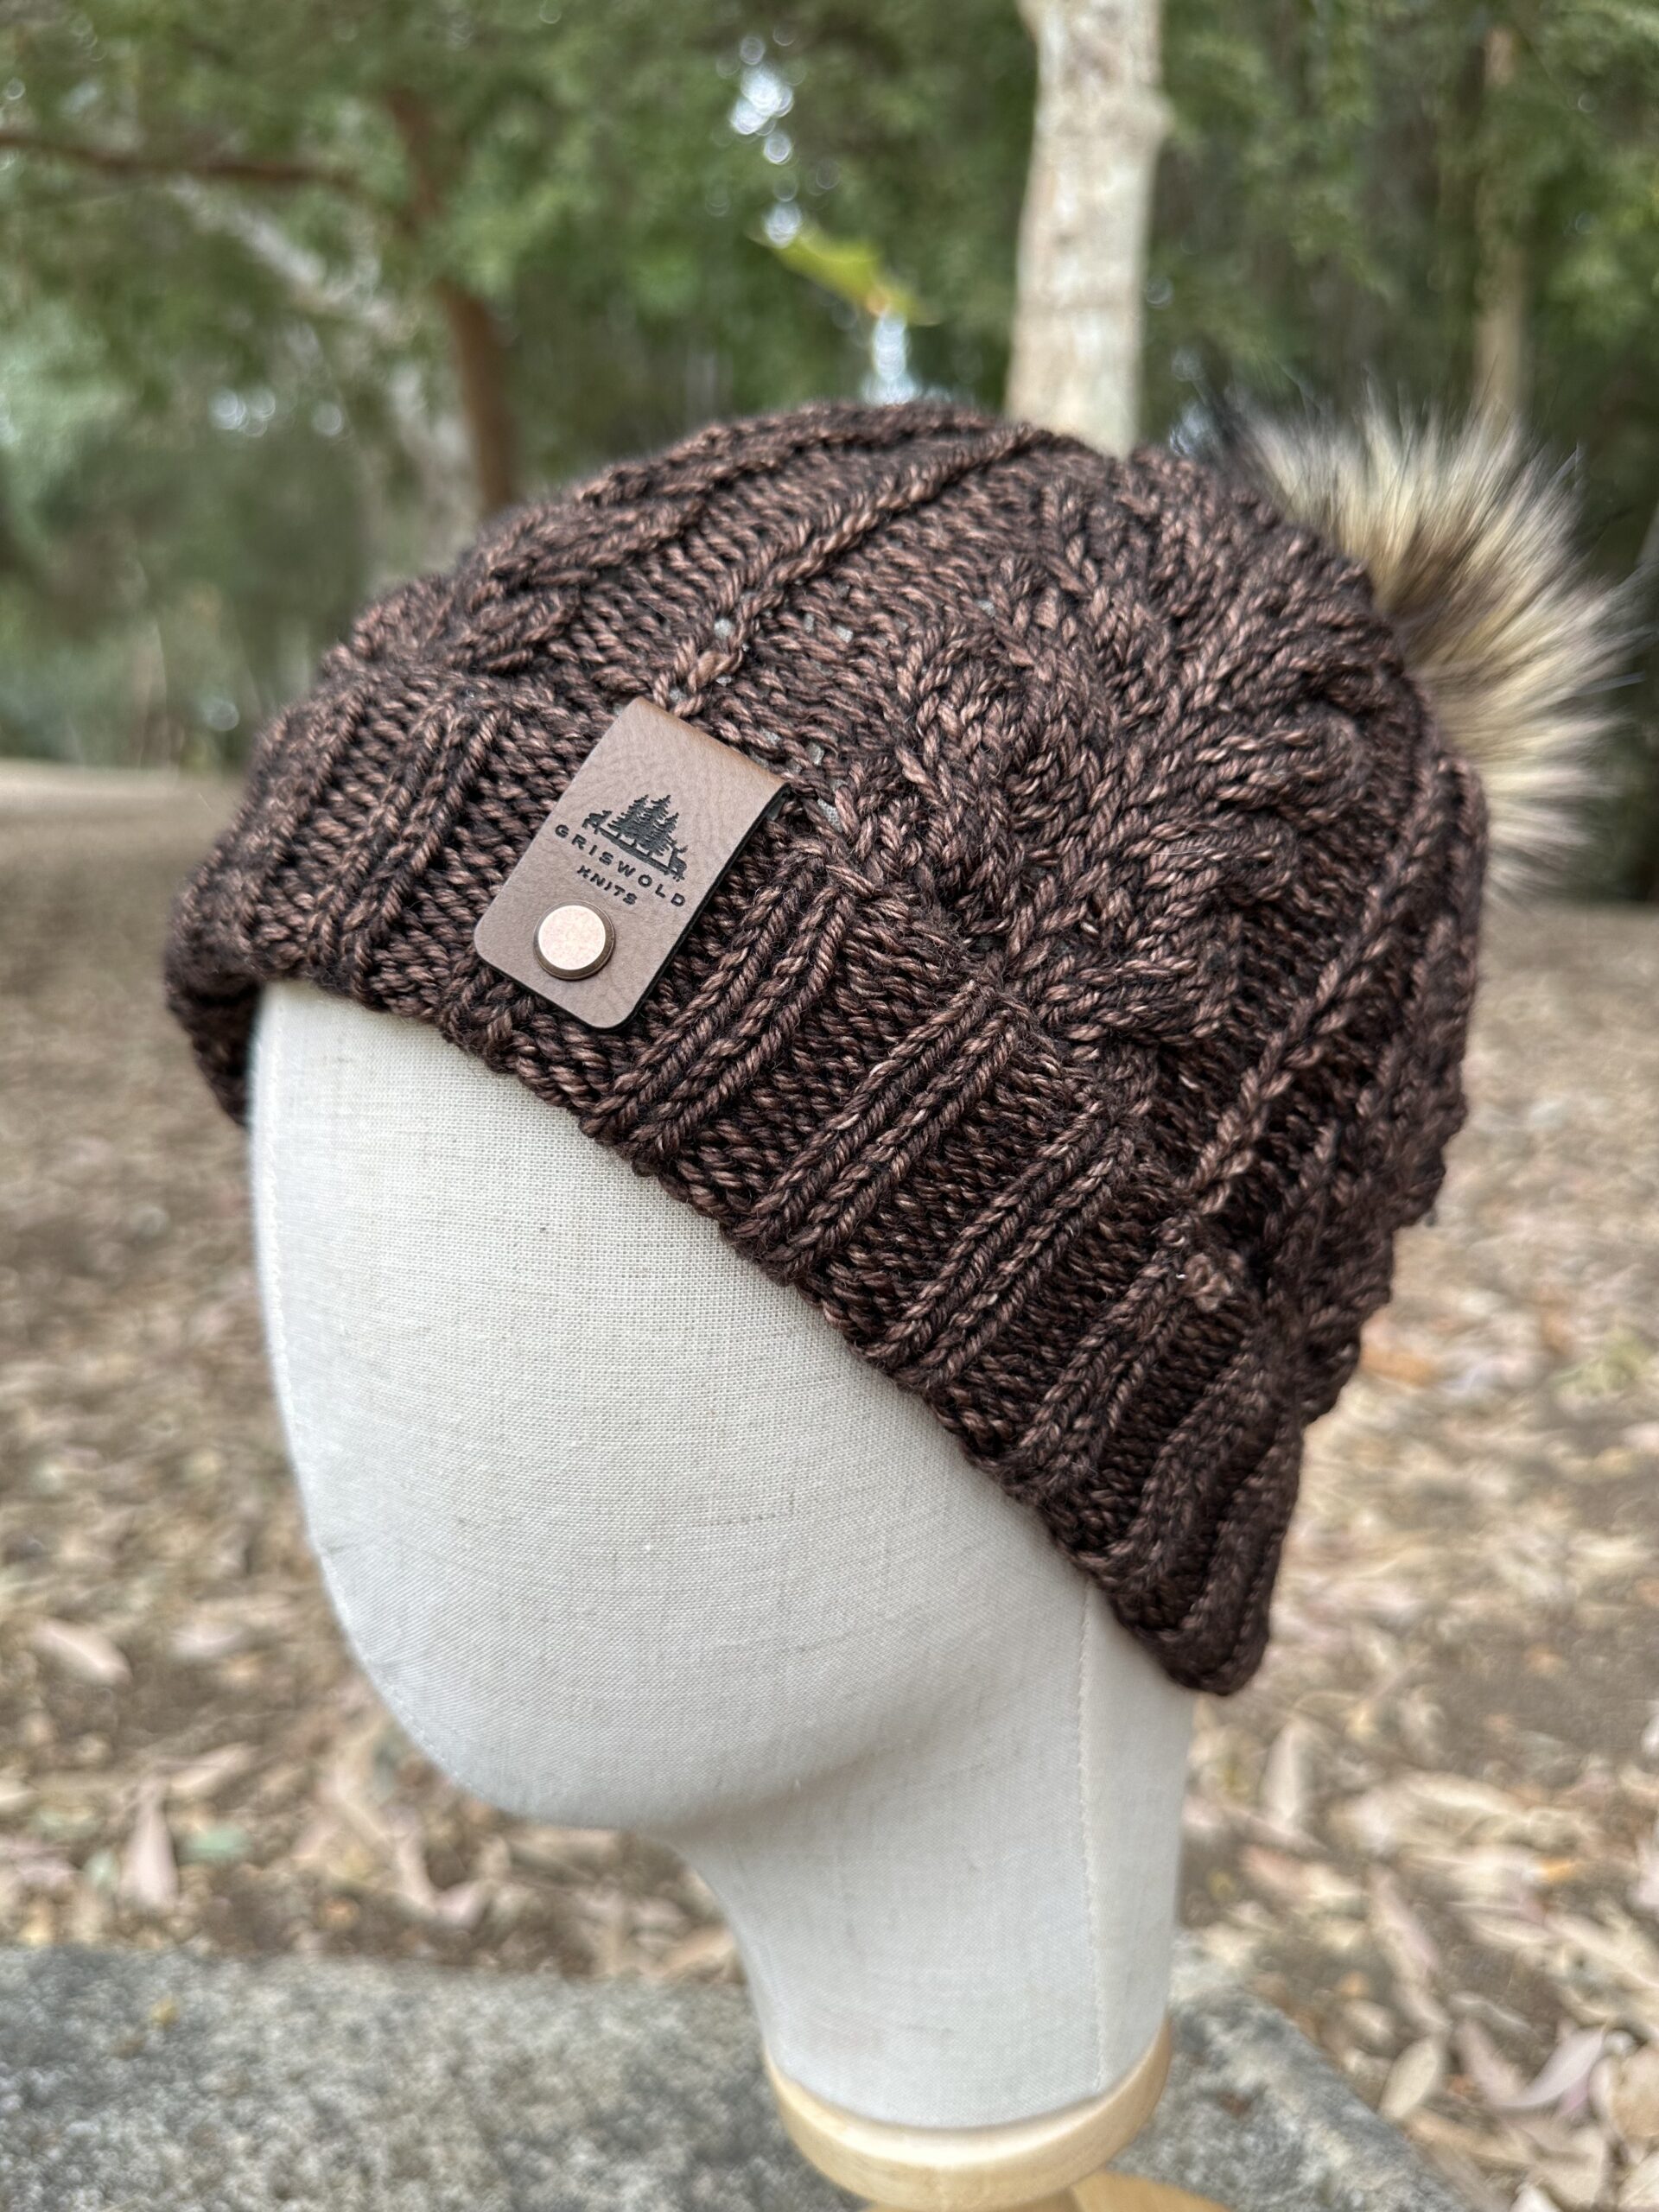
Yarn: This pattern is designed for no. 4 medium worsted weight yarn. I used Malabrigo Rios (pictured above in the color Cowboy) but you can use any comparable yarn that meets the gauge requirements. I have found that Cascade Superwash 220 yarn is a great substitute.
Supplies:
- US size 7 4.5mm 16 inch circular knitting needles
- US size 9 5.5mm 16 inch circular knitting needles
- Medium worsted yarn approximately 90 grams or 190 yards
- Tapestry needle for weaving in ends
- Measuring tape
- Stitch markers (optional)
- US size 9 5.5mm Double Pointed Needles (DPN)
- Cable Needle
Abbreviations:
K– Knit
P– Purl
Sts– Stitches
C6B (Cable 6 Back)- Slip 3 stitches onto your cable needle and hold towards the back of your work. Knit 3 stitches from the left hand needle, then knit 3 stitches from the cable needle
C6F (Cable 6 Front)- Slip 3 stitches onto your cable needle and hold towards the front of your work. Knit 3 stitches from the left hand needle, then knit 3 stitches from the cable needle
Sl1p wyib (Slip 1 purlwise with yarn in back)- Hold working yarn towards the back of your work. Insert the right needle into the stitch on the left hand, needle as if to purl. Instead of purling, slip the stitch from the left hand needle to the right hand needle.
K2TOG– Knit 2 stitches together
K3TOG– Knit 3 stitches together
P2TOG– Purl 2 stitches together
KFB (knit front and back)- begin to knit the stitch as you would normally but instead of sliding the stitch off of the left hand needle, bring the tip of your right hand needle to the back of the stitch on your left needle and knit through the back as well. By knitting through the front and back of the same stitch you create two stitches in one. ** Repeat instructions within asterisks
Skill Level: Advanced beginner/Intermediate
Hat Dimensions: This pattern is for an adult sized womens hat.
Head circumference: 20-23 inches
Height: 9 inches
Width: 7- 7.5 inches unstretched
Gauge:(2×2 inch stockinette in the round) 10 sts x 13 rows using US 9 5.5.mm needles
How to adjust your hat:
Please be sure to check your gauge. I tend to be a bit of a tighter knitter so you may need to go up or down a needle size depending on your yarn and knitting tension. If you need to adjust the size of your brim make sure to increase/decrease by multiples of 4. If you need to adjust the body of your hat you can increase/decrease by multiples of 18. In this pattern, I initially cast on 96 stitches for the brim (divisible by 4) and increase to 108 stitches for the body of the hat (divisible by 18).
Instructions
Using 4.5mm 16 inch circular knitting needles cast on 96 stitches to join in the round. . Feel free to use any cast on and join method you like. Just make sure that you have 96 stitches total when you begin knitting your hat. Continue using 4.5mm 16 inch circular needles to knit either a single brim or a folded brim.
Option # 1 Single Brim
Rounds 1-12: *K2,P2*
Round 13: Switch to 5.5mm 16 inch circular knitting needles then *K7, KFB* for one increase round. Once the increase round is complete you should have 108 stitches. Proceed to the body of the hat.
Option # 2 Folded Brim
*K2, P2* until your hat measures 4 inches from the cast on edge. Once you reach your desired length, switch to 5.5mm 16inch circular knitting needles then *K7, KFB* for one increase round. You should now have 108 stitches . Proceed to the body of the hat.
Body (5.5mm)
- C6B, sl1p wyib, C6F, P2, sl1p wyib, P2
- K13, P2, K1, P2
- K6, sl1p wyib, K6, P2, sl1p wyib, P2
- K13, P2, K1, P2
- K6, sl1p wyib, K6, P2, sl1p wyib, P2
- C6B, K1, C6F, P2, K1, P2
- K6, sl1p wyib, K6, P2, sl1p wyib, P2
- K13, P2, K1, P2
- K6, sl1p wyib, K6, P2, sl1p wyib, P2
- K13, P2, K1, P2
- K6, sl1p wyib, K6, P2, sl1p wyib, P2
- K13, P2, K1, P2
For single brim hats, repeat rounds 1-12 until your hat measures 8 and ½ inches from the cast on edge. Then begin to decrease. You can end the body of the hat on any row. The row you end on will determine which set of decrease instructions you follow. When the stitches get too tight, switch to size 5.5mm DPN.
For a hat with a folded brim, repeat rounds 1-12 of the body until your hat measures 10 and ½ inches from the cast on edge. Then begin to decrease. You can end the body of the hat on any row. The row you end on will determine which set of decrease instructions you follow. When the stitches get too tight, switch to your size 5.5 mm DPNs.
Decreasing will add roughly ½ inch to your hat. Once finished, your hat should measure 9 inches total for a single brim and 11 inches total for a folded brim when you measure from the cast on edge to the top of your hat.
Decrease
If you end on round 1,3, 7, 9 0r 11
- K13, P2, K1, P2
- K2, K2TOG, K2, sl1p wyib, K2, K2TOG, K2, P2TOG, sl1p wyib, P2TOG
- K2, k2TOG, K2, K2TOG, K1, K1, K2, K2TOG, K1, P1, K1, P1
- K2TOG, K2TOG, sl1p wyib, K2TOG, K2TOG, P1, sl1p wyib, P1
- K2TOG, K1, K2TOG, P1, K1,P1
- K3TOG, P1, sl1p wyib, P1
If you end on round 2, 4, 6, 8 or 10
- K6, sl1p wyib, K6, P2, sl1p wyib, P2
- K2, K2TOG, K2, K1, K2, K2TOG, K2, P2TOG, K1, P2TOG
- K2, K2TOG, K1, sl1p wyib, K2, K2TOG, K1, P1, sl1p wyib, P1
- K2TOG, K2TOG, K1, K2TOG, K2TOG, P1, K1, P1
- K2TOG, sl1p wyib, K2TOG, P1, sl1p wyib, P1
- K3TOG, P1, K1, P1
If you end on round 12
- C6B, sl1p wyib, C6F, P2, sl1p wyib, P2
- K2, K2TOG, K2, K1, K2, K2TOG, K2, P2TOG, K1, P2TOG
- K2, K2TOG, K1, sl1p wyib, K2, K2TOG, K1, P1, sl1p wyib, P1
- K2TOG, K2TOG, K1, K2TOG, K2TOG, P1, K1, P1
- K2TOG, sl1p wyib, K2TOG, P1, sl1p wyib, P1
- K3TOG, P1, K1,P1
Once you have finished decreasing all that is left to do is cinch your beanie, weave in those ends and enjoy!
Thank you so much for supporting my little business! If you have any questions please feel free to message me through Etsy and I will respond as soon as possible. You are more than welcome to sell your Wild Oak Beanies in small quantities, but please give credit to my online shop GriswoldKnits. Please do not copy, recreate, sell or distribute my pattern ©2022 GriswoldKnits, All rights reserved. I would love to see your work! Tag me on instagram @Griswoldknits and use the hashtags #Griswoldknits and #wildoakbeanie.