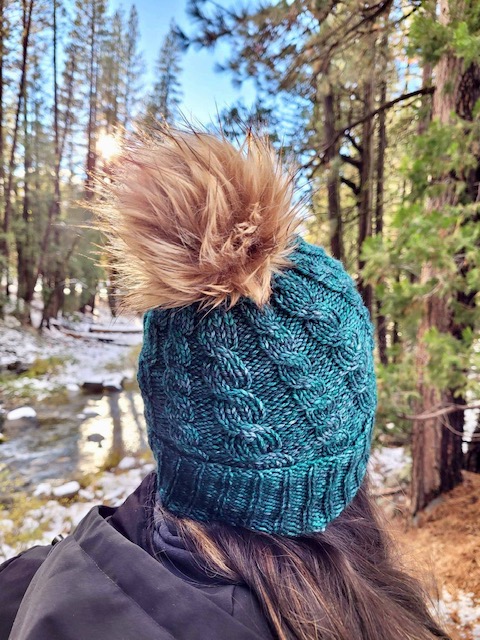
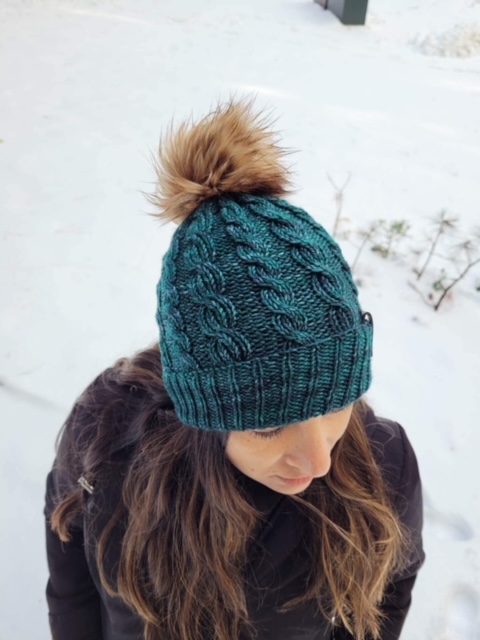
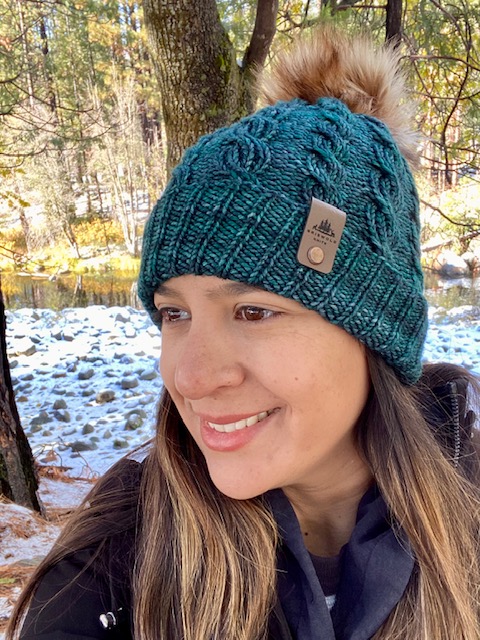
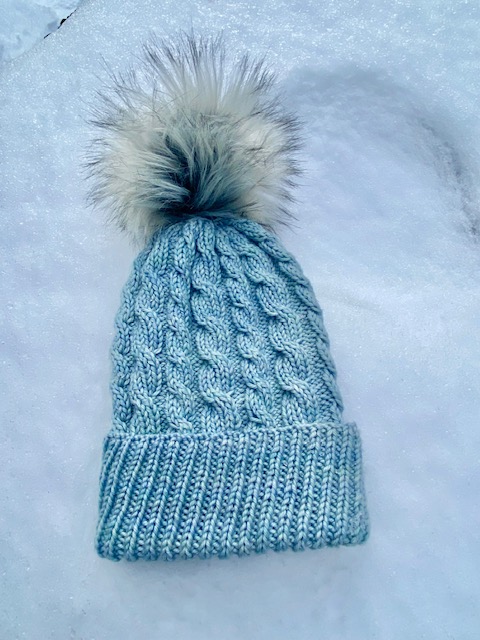
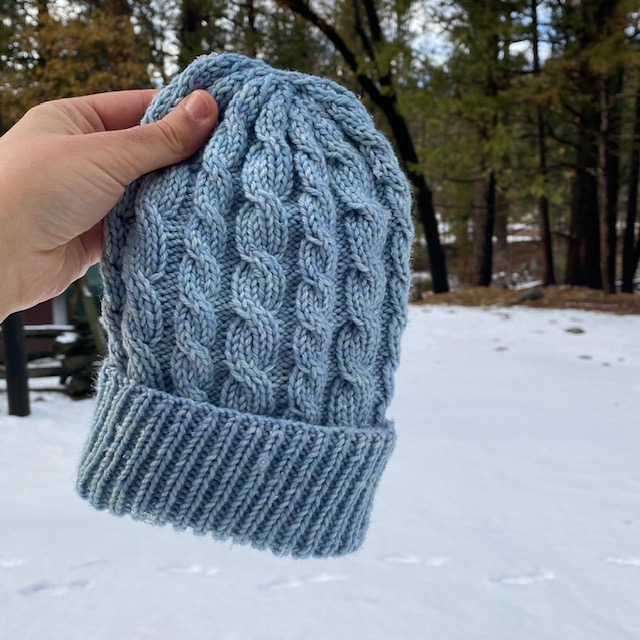
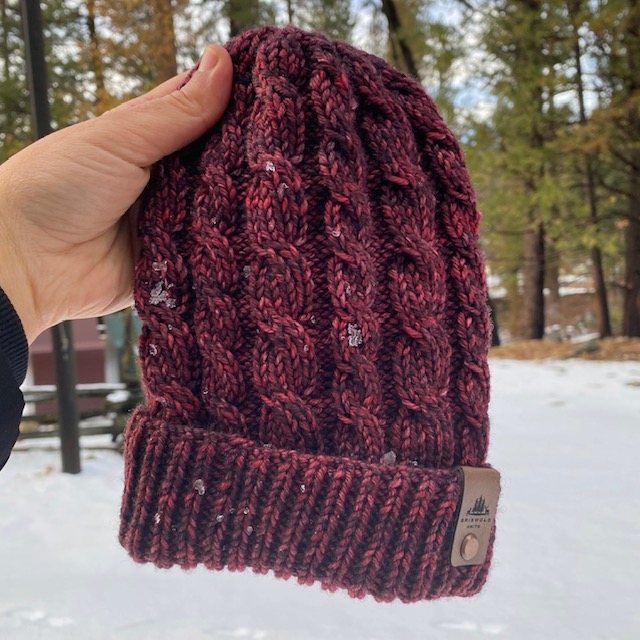
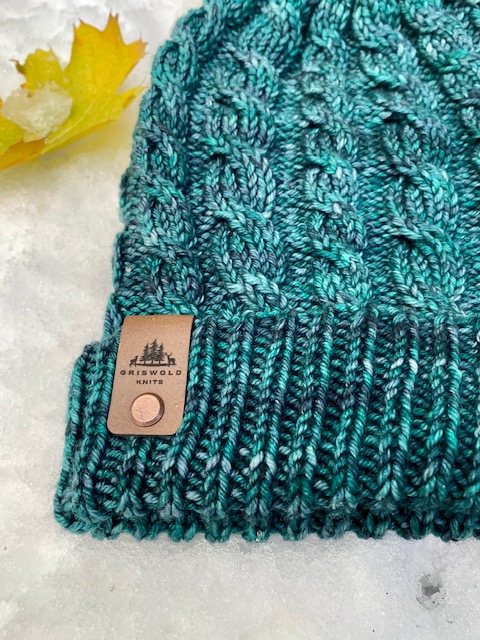
About this hat: The Juniper Ribbed Cable Beanie or “Juniper Beanie” is made using medium worsted weight yarn. A twisted rib folded brim paired with the ribbed cabling gives this hat plenty of stretch and a wonderful textural look. The pattern is specifically for an adult size hat measuring 20-23 inches in circumference, but it can be easily adjusted.
Yarn: I used 90g/189 yards of Malabrigo Rios in the color Pines for this project. Any comparable medium worsted weight yarn that meets the required gauge will work. Use what you have and enjoy!
Hat Dimensions:
Head circumference: Adult size hat with a circumference of 20-23 inches. This hat can be easily modified to fit various sizes.
Height: 11 – 11 and ½ inches when unfolded and measured from the cast on edge
Width: 7- 7.5 inches wide unstretched
Gauge: 2 x2 inch stockinette 11 sts x 15 rows using 5.0 mm needles.
How to adjust your hat:
Please be sure to check your gauge. You may need to go up or down a needle size depending on your yarn and knitting tension. If you need to adjust the size of your brim, make sure to increase/decrease by multiples of 3. If you need to adjust the body of your hat you can increase/decrease by multiples of 18. In this pattern, I initially cast on 96 stitches for the brim (divisible by 3) and increase to 108 stitches for the body of the hat (divisible by 18).
Supplies:
- 4.5mm size 16-inch circular knitting needles
- 5.0mm size 16-inch circular knitting needles
- Medium worsted yarn approximately 90 grams or 190 yards
- Cabling Needle (CN)
- Tapestry needle for weaving in ends
- Measuring Tape
- Stitch markers (optional)
- 5.0 mm Double Pointed Needles (DPN)- optional, you can use any preferred method to decrease the crown of your hat.
Abbreviations:
CO– Cast On
K– Knit
P– Purl
K2TOG– Knit two together
P2TOG– Purl two together
TBL– Through the back loop
KFB (knit front and back)– begin to knit the stitch as you would normally but instead of sliding the stitch off of the left hand needle, bring the tip of your right hand needle to the back of the stitch on your left needle and knit through the back as well. By knitting through the front and back of the same stitch you create two stitches in one.
* * Repeat instructions within asterisks
C5F wcp (Cable 5 Front with Centered Purl): Slip first two knit stitches onto your CN. Push those two slipped stitches all the way to the far right end of your CN. Insert the tip of your CN into the next purl stitch and slip the stitch knitwise from the left hand knitting needle onto the cable needle. Hold the three stitches towards the front of your work. Knit the next two stitches from your left hand needle onto your right hand needle. Next, from the CN, purl the first stitch, knit the second stitch and finally knit the last stitch through the back loop.
Link to youtube video: https://youtu.be/IqMteRlqMEg
C7Fwcp (Cable 7 Front ribbed with Centered Purl): Slip the first three stitches (K,P,K) onto your Cable needle. Push those three slipped stitches all the way to the far right end of your CN. Insert the tip of your CN into the next purl stitch and slip the stitch knitwise from the left hand knitting needle onto your cable needle. Hold the four stitches towards the front of your work. Then, K1, P1, K1 from your left hand needle onto your right hand needle. Next, From the CN, P1,K1, P1, K1TBL.
Link to youtube video: https://youtu.be/KgnLWY5pxuY
SSK (Slip, Slip, Knit) : Slip 1 stitch knitwise from the left hand knitting needle onto the right hand knitting needle, then slip the 2nd stitch knitwise from the left hand knitting needle onto the right hand needle . Transfer the two slipped stitches from the right hand needle back onto the left hand needle. Knit the two slipped stitches together through the back loop.
Link to youtube video: https://youtu.be/Rc1FjGpF0pA
This post contains affiliate links, which means I may receive a small commission if you purchase through my links, at no extra cost to you. Please read full disclosure for more information.
Instructions:
This hat is knit from the brim up. You will be using 4.5mm 16 inch circular knitting needles for the brim of the hat and will change to 5.0mm 16 inch circular knitting needles to knit the body of the hat.
Using 4.5 mm 16 inch circular knitting needles CO 96 and join in the round. Feel free to use any method of joining in the round, just make sure you have 96 stitches before beginning.
*Note* You will only need to knit through the back loop (TBL) when the pattern indicates to do so. Otherwise, you will be knitting normally through the front loop.
Brim: * K2TBL, P1TBL* repeat until the brim measures 4 inches in length.
Switch to 5.0mm 16 inch circular knitting needles then knit set up round and increase to 108 stitches.
Set up round: *K7, KFB*
Once you have completed the set up round you should have 108 stitches. Proceed to the body of the hat.
Body (5.0mm)
- *K1, P1 (x3), K1, P3, K2, P1, K2, P3*
- *K1, P1 (x3), K1, P3, K2, P1, K2, P3*
- *K1, P1 (x3), K1, P3, K2, P1, K2, P3*
- *K1, P1 (x3), K1, P3, K2, P1, K2, P3*
- *K1, P1 (x3), K1, P3, K2, P1, K2, P3*
- *K1, P1 (x3), K1, P3, C5Fwcp, P3 *
- *K1, P1 (x3), K1, P3, K2, P1, K2, P3*
- *C7Fwcp , P3, K2, P1, K2, P3*
- *K1, P1 (x3), K1, P3, K2, P1, K2, P3*
- *K1, P1 (x3), K1, P3, K2, P1, K2, P3*
- *K1, P1 (x3), K1, P3, K2, P1, K2, P3*
- *K1, P1 (x3), K1, P3, C5Fwcp, P3*
- *K1, P1 (x3), K1, P3, K2, P1, K2, P3*
- *K1, P1 (x3), K1, P3, K2, P1, K2, P3*
- *K1, P1 (x3), K1, P3, K2, P1, K2, P3*
- *C7Fwcp, P3, K2, P1, K2, P3*
- * K1, P1 (x3), K1, P3, K2, P1, K2, P3*
- *K1, P1 (x3), K1, P3, C5Fwcp, P3*
- *K1, P1 (x3), K1, P3, K2, P1, K2, P3*
- *K1, P1 (x3), K1, P3, K2, P1, K2, P3*
- *K1, P1 (x3), K1, P3, K2, P1, K2, P3*
- *K1, P1 (x3), K1, P3, K2, P1, K2, P3*
- *K1, P1 (x3), K1, P3, K2, P1, K2, P3*
- *C7Fwcp, P3, C5Fwcp, P3*
Repeat rounds 1-24 until your hat measures 10 and ½ inches in length from the cast on edge. For a slightly longer beanie that will allow for a longer folded brim (as pictured on title page), knit until your hat measures 11 inches. You can end on rounds 2, 3, 4, 10, 14, 20, 21 or 22 and then proceed to the decrease instructions. Decreasing will add approximately ½ inches to your hat’s total length. Again, make sure to measure from the cast on edge to the top of your hat to determine the length.
Decrease
- *SSK, SSK, SSK, K1, P3, SSK, P1, SSK, P3*
- *SSK,SSK, P3, SSK, K1, P3*
- *SSK, P1, P2TOG*
- *K1, P2TOG*
- *K2TOG*
All that’s left to do is weave in those ends and enjoy!
Thank you so much for stopping in and hopefully knitting my hat! You are more than welcome to sell your Juniper Beanies in small quantities, but please give credit for my pattern design griswoldknits.com. I share my designs for free in good faith that you will respect my intellectual property. Please do not copy, recreate, sell or distribute my pattern ©2022 GriswoldKnits, All rights reserved. I would love to see your work! Tag me on instagram @Griswoldknits and use the hashtags #Griswoldknits and #juniperbeanie


